
Vendor Payment and Linked Expenses
Arbizon has introduced a feature to create Vendor Payment records and associate expenses. This will help the firm monitor payments, such as those made to bailiffs for physical service expenses.
How to create a new Vendor Payment
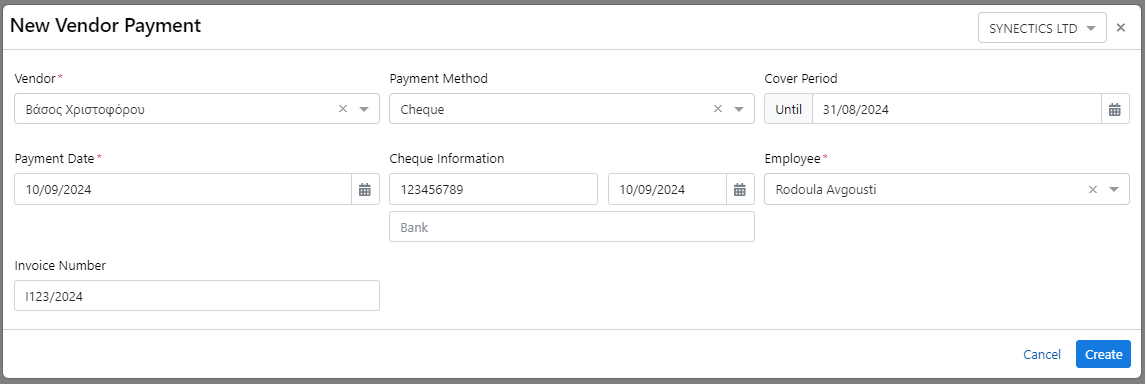
If you're familiar with Invoice creation, the Vendor Payment process is similar. You create the payment and then link the associated expenses.
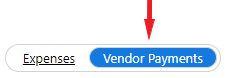
Use the left main menu ☰ and select Expenses
Use the toggle button to switch to the Vendor Payments management screen.
Press the Create button
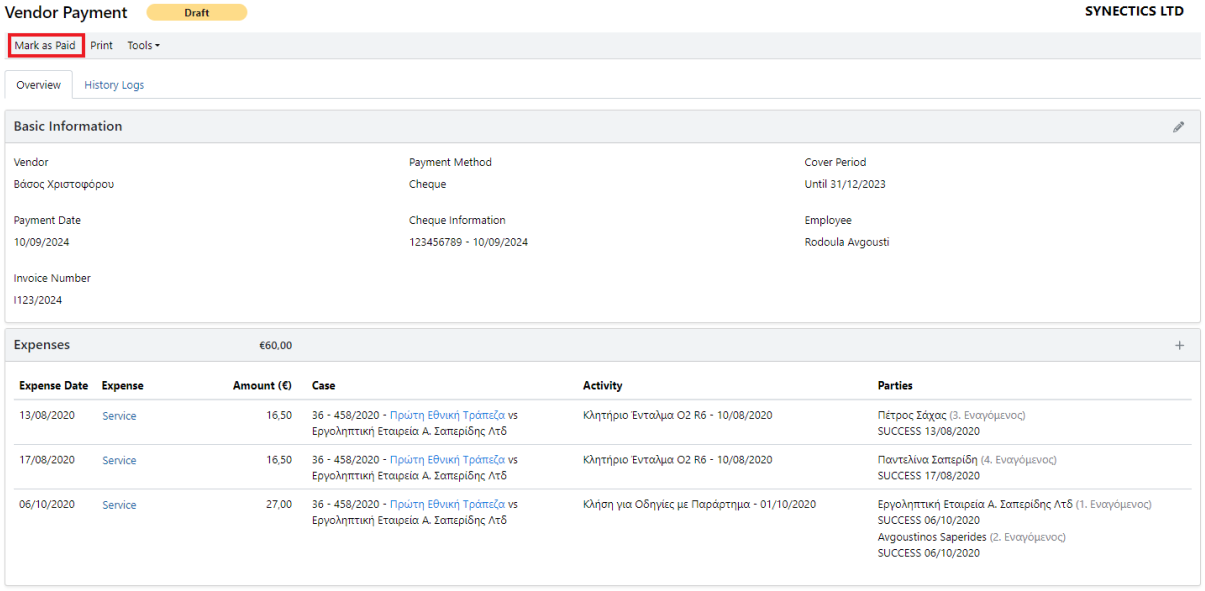
In the ‘New Vendor Payment’ modal complete the necessary fields and click Create
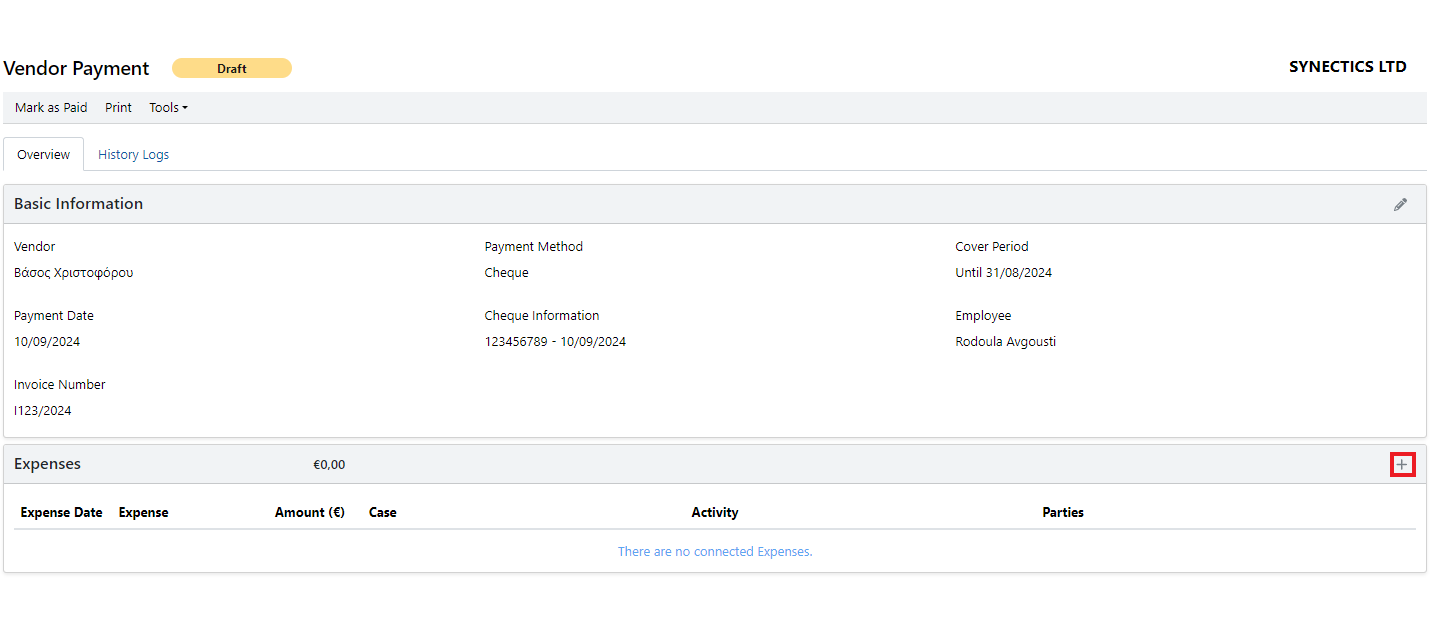
On the Expenses table, press the + icon
In the Add Expenses to Vendor Payment modal, use the available buttons to select the Expenses you wish to pay the Vendor for.
Note that individual expense lines are clickable, allowing you to move them between the Available Expenses and Selected Expenses tables.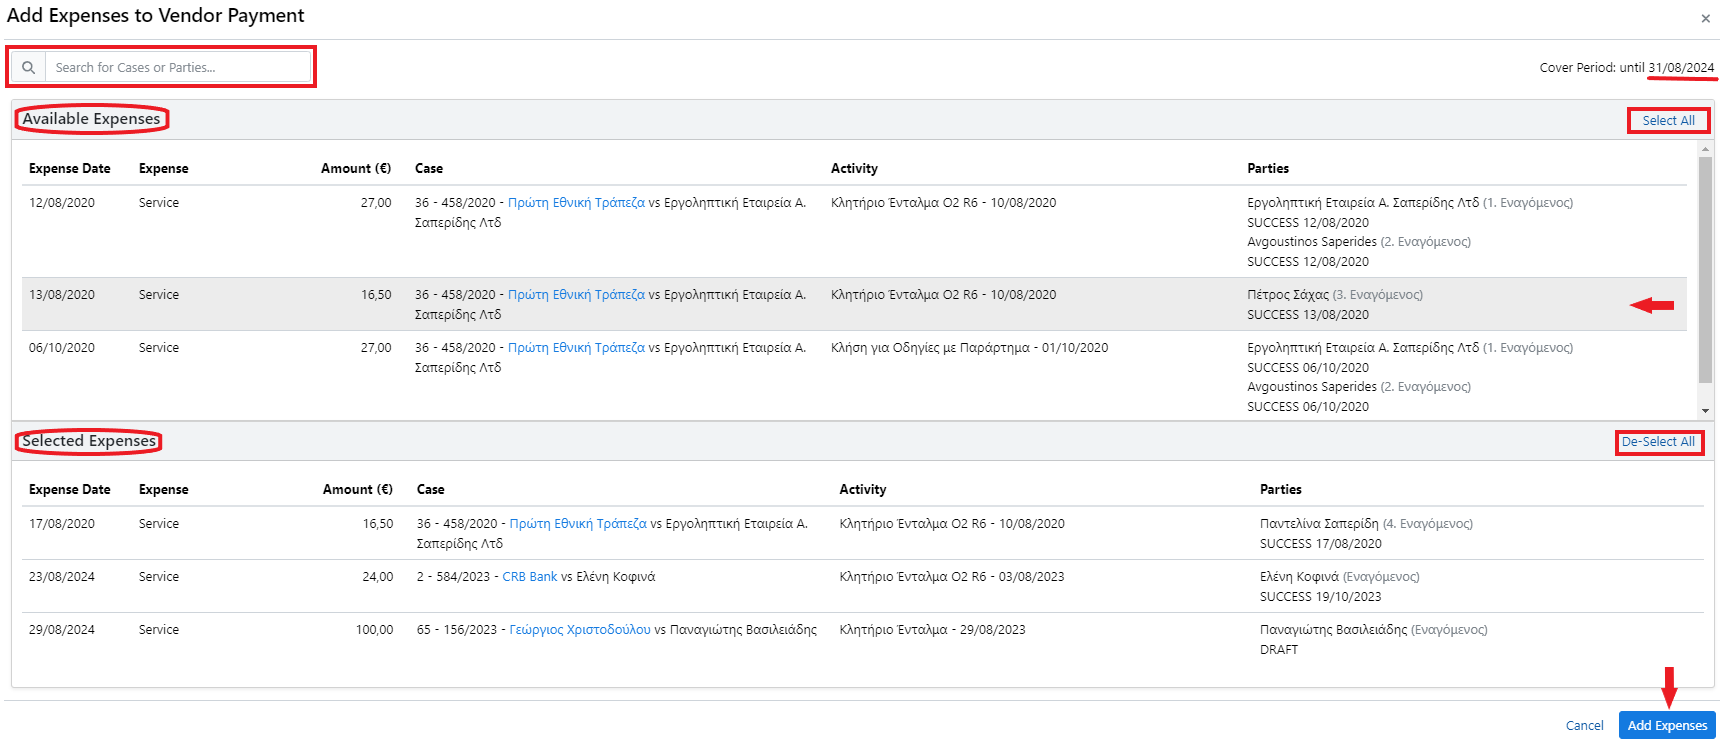
Once you are done with your selection, press the Add Expenses button.
Review and adjust the Vendor Payment details if needed.
While the Vendor Payment is still Draft, the Expenses table remains editable. You can add or remove expenses at any time. Authorized personnel can also update individual expense details by clicking on the specific expense link.

Finally, press the Mark as Paid button.
Your Vendor Payment is now marked as Final and locked.
Authorized users can change its status back to Draft to make corrections.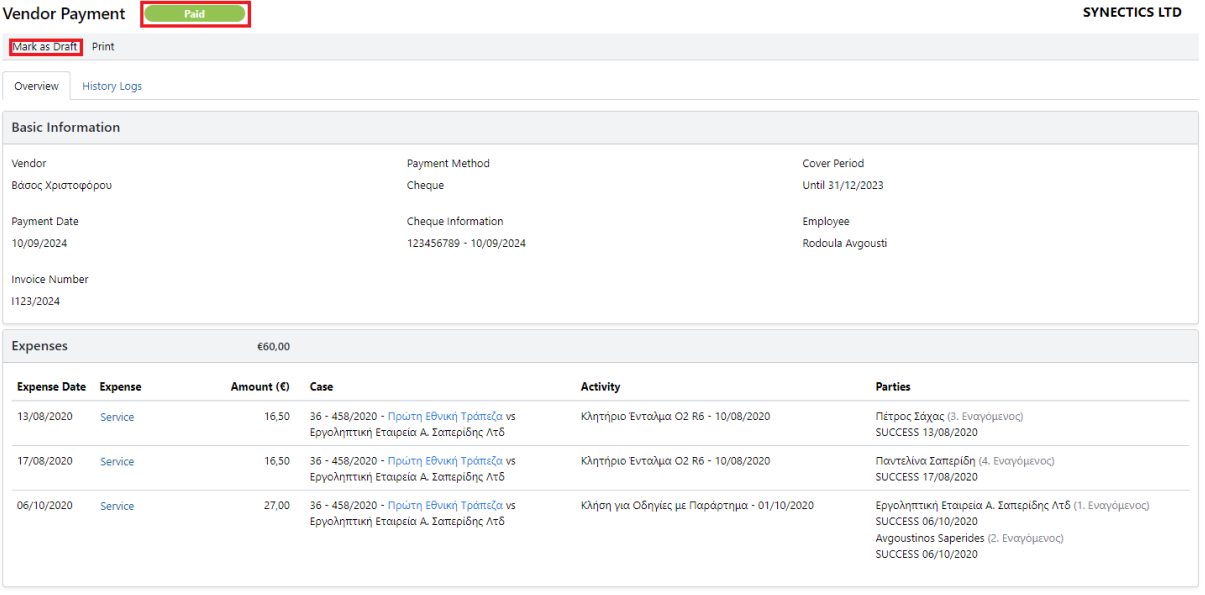
Use the Print button to generate a report of the Expenses connected to the specific Vendor Payment.
How to check if Expenses were linked or not to a Vendor Payment
Use the left main menu ☰ and select Expenses
In the Expenses management screen press the More filters and select the Included in Vendor Payment.
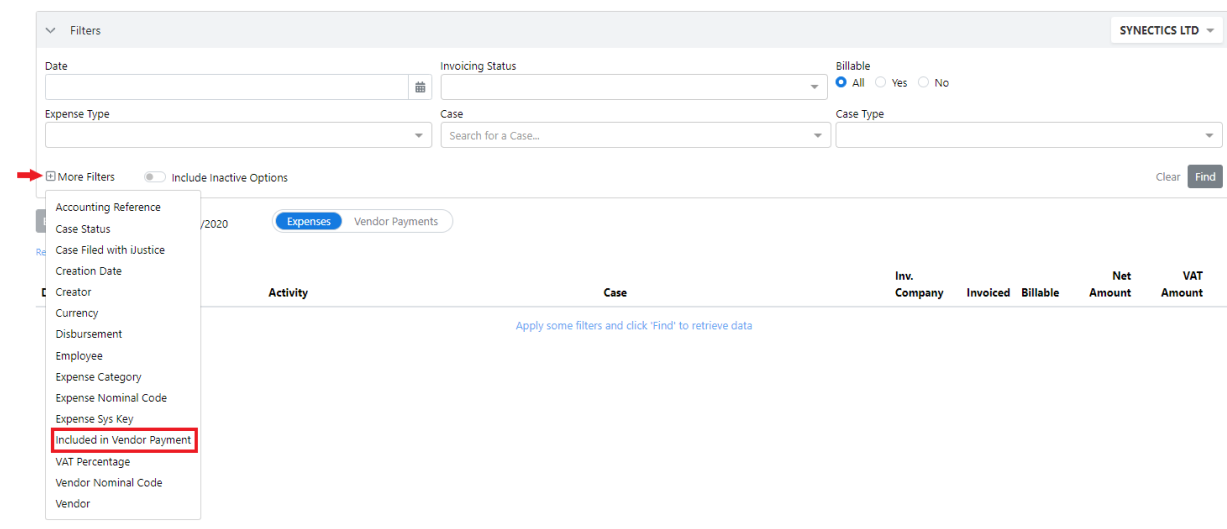
To see which expenses have already been connected to a vendor payment, select 'Yes'. To view expenses that are not included in any vendor payment, select 'No'.

Draft Vendor Payments are taken into consideration.
Once expenses are marked as paid to vendors, they become locked and can only be edited or deleted by authorized users