
How to Create a new Legal Case in Arbizon
High Level Instructions to create a new legal case from the time of the assignment by the client until the filing of the originating document.
Create a New Legal Case
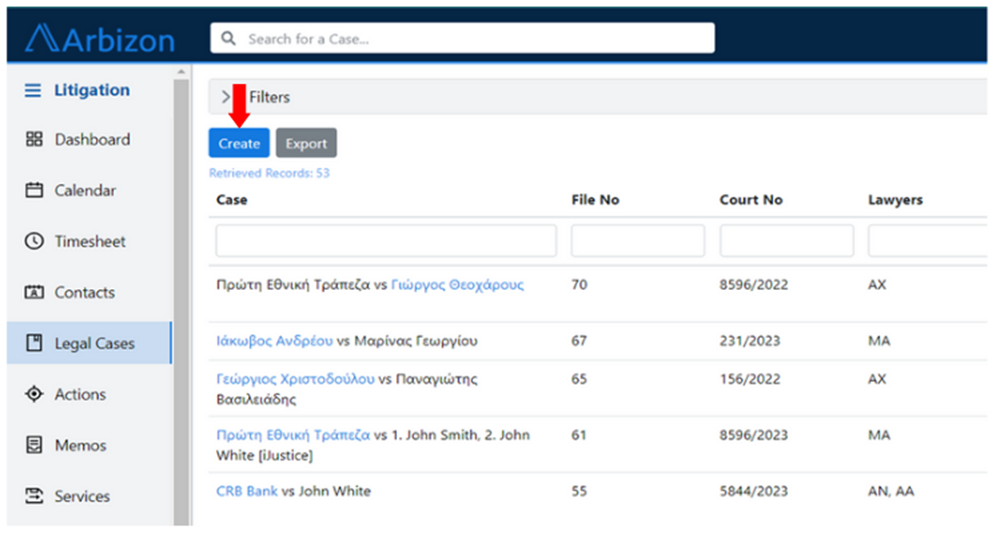
In the Litigation module, click on the Legal Cases section and then on the Create button.
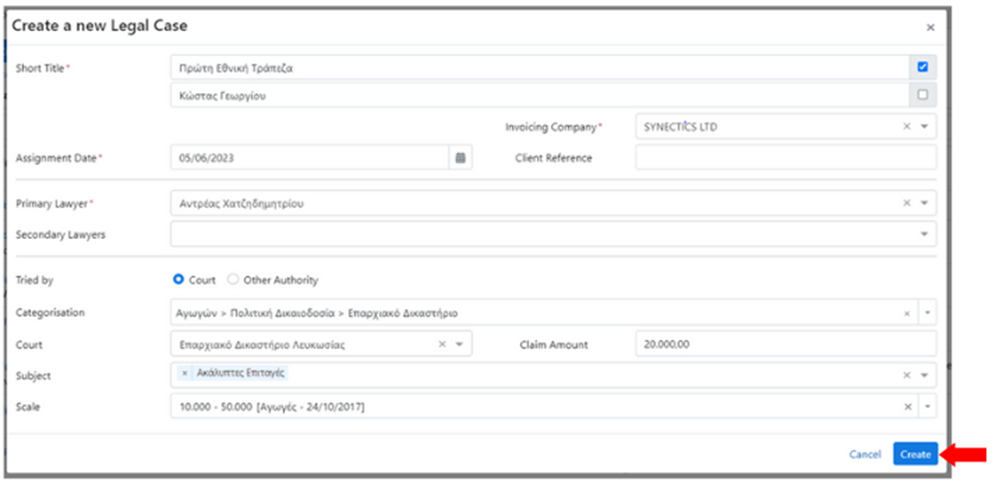
Complete the fields in the Create a new Legal Case window.
Click on the Create button.
In the Basic Information table
Click on the pencil icon and complete the Judge.
Click on the + button to select and complete additional information such as Bank Account Number (Τραπεζικοί Λογαριασμοί).
Note: Add more fields through Custom fields functionality in System menu.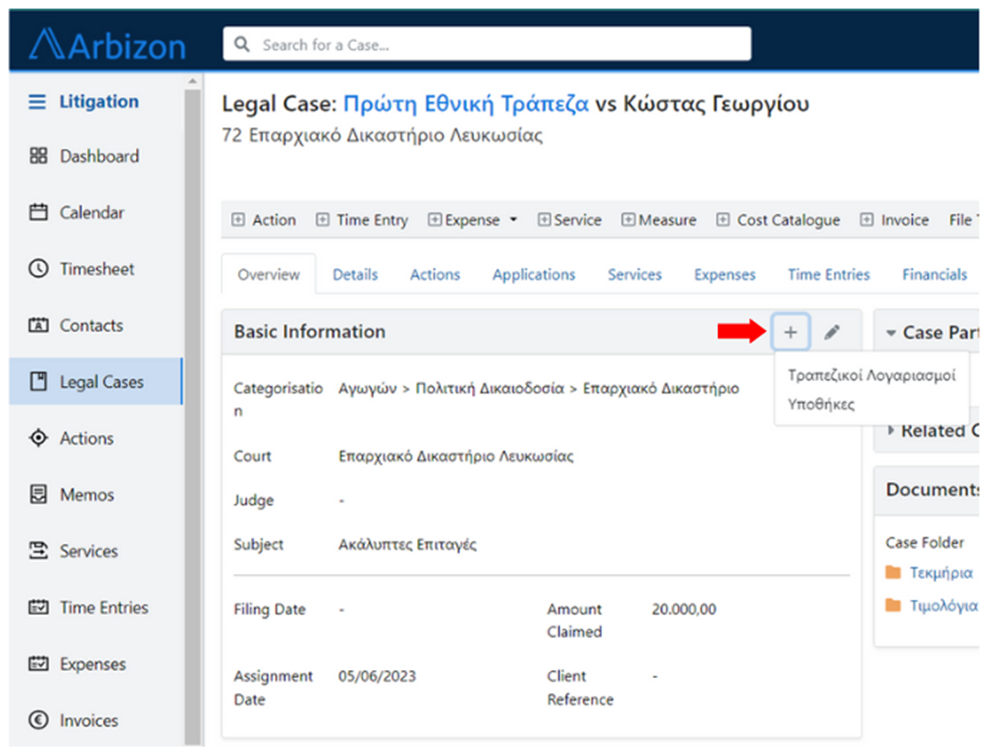
Write on the physical file of the legal case the file number of the case generated from Arbizon.
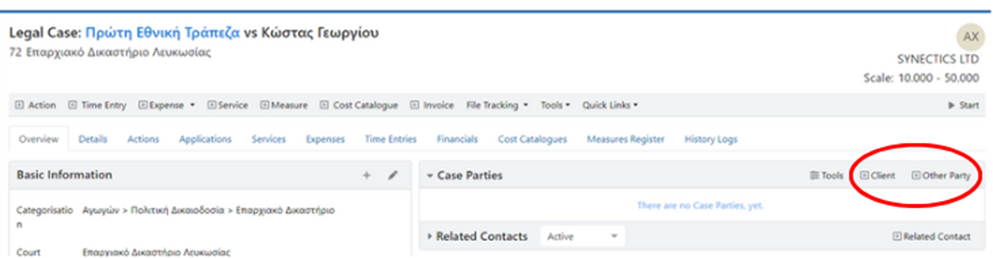
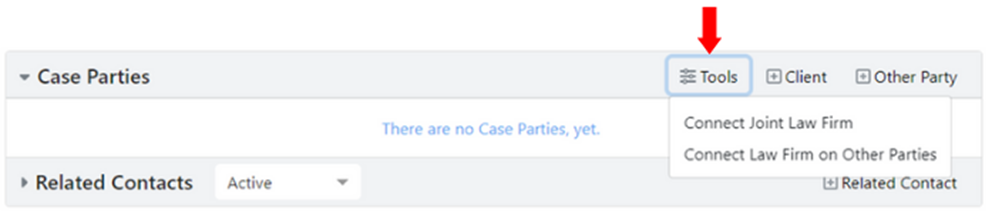
Add the Case Parties in the Legal Case (Clients and Other Parties)
In the Case Parties table click + Client to add the Clients.
In the Case Parties table click + Other Party to add the remaining Parties/Litigants.
Connect the Opposing Law Firms on the Litigants
In the Case Parties table click on the Tools button and select Connect Law Firm on Other Parties.
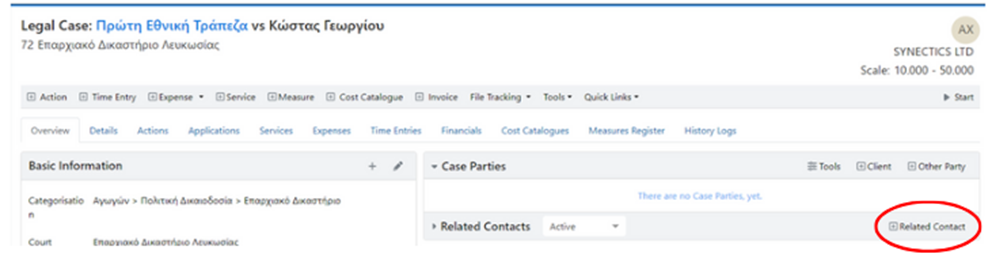
Connect other Contacts on the Legal Case
In the Related Contacts table, click + Related Contact to add other related contacts, like lawyers, client instructing person or invoice recipient, etc.
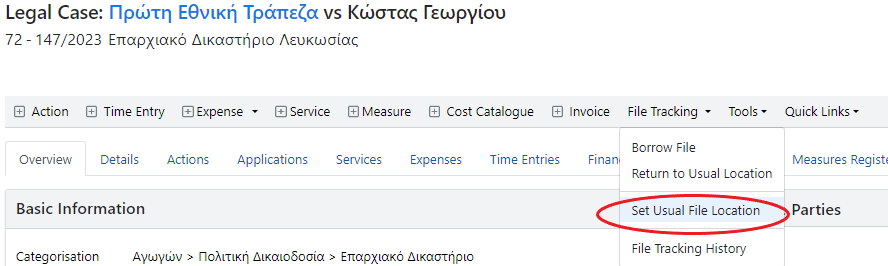
Set the Usual File Location
Click on the File Tracking button and then Set Usual File Location.
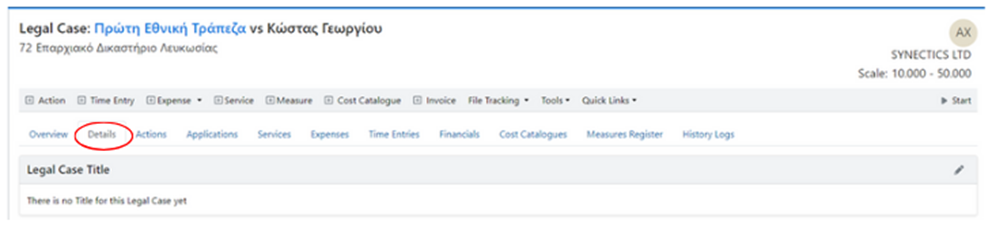
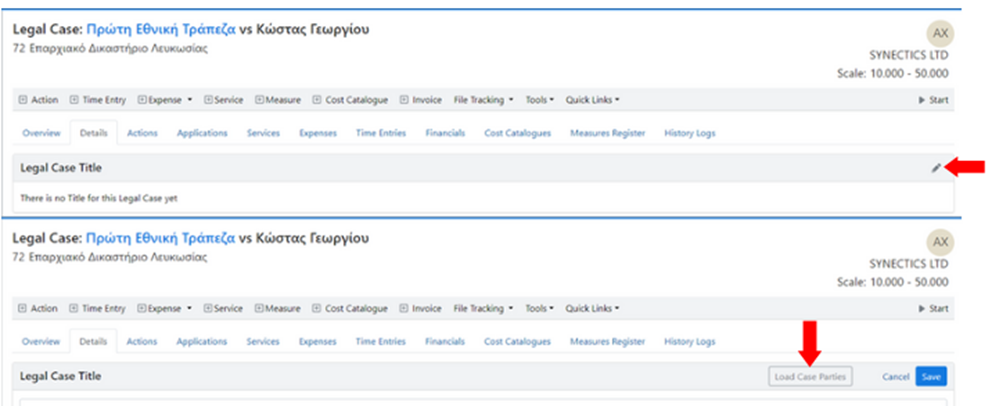
Complete the Legal Case Official Title
View the Legal Case Details tab.
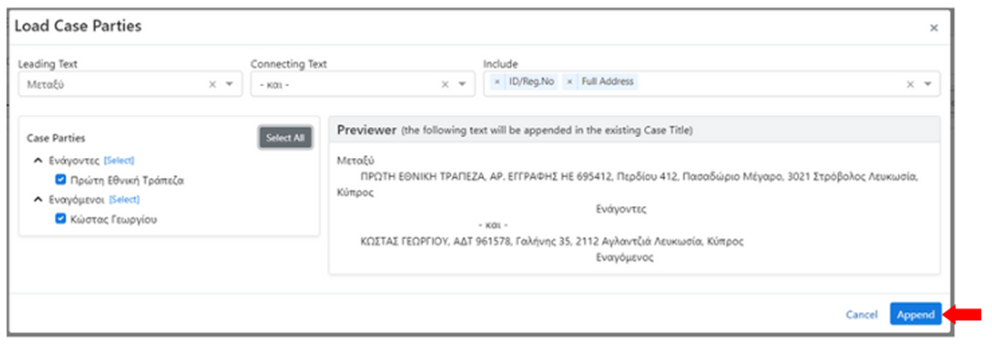
In the Legal Case Title table click on the pencil icon and then the Load Case Parties button.
Complete the fields in the Load Case Parties window and then click on the Append button.
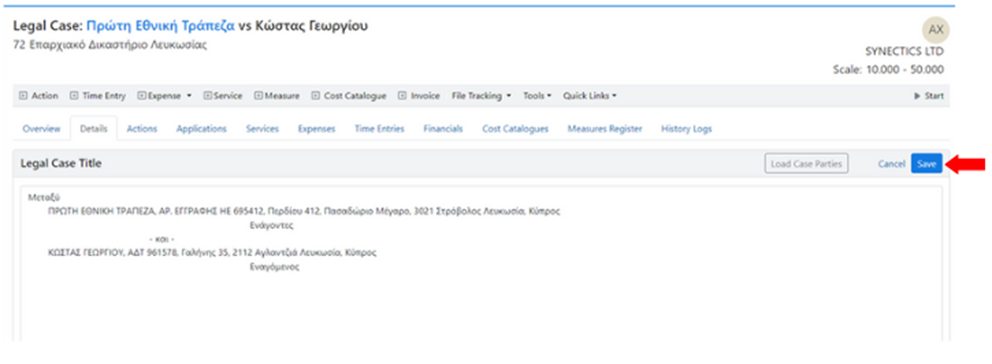
Correct the title as and when needed and then click on the Save button.
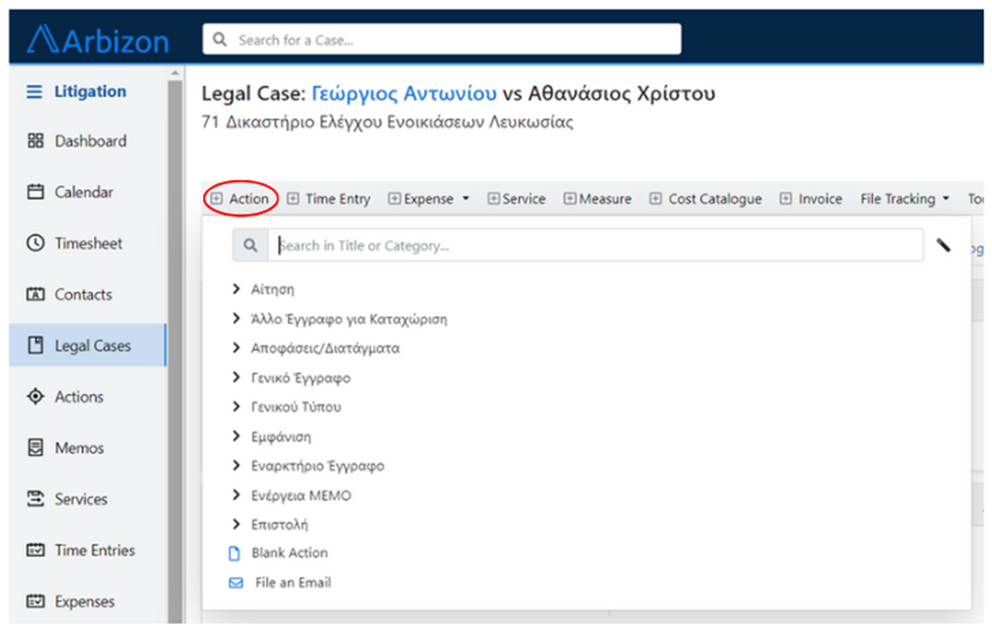
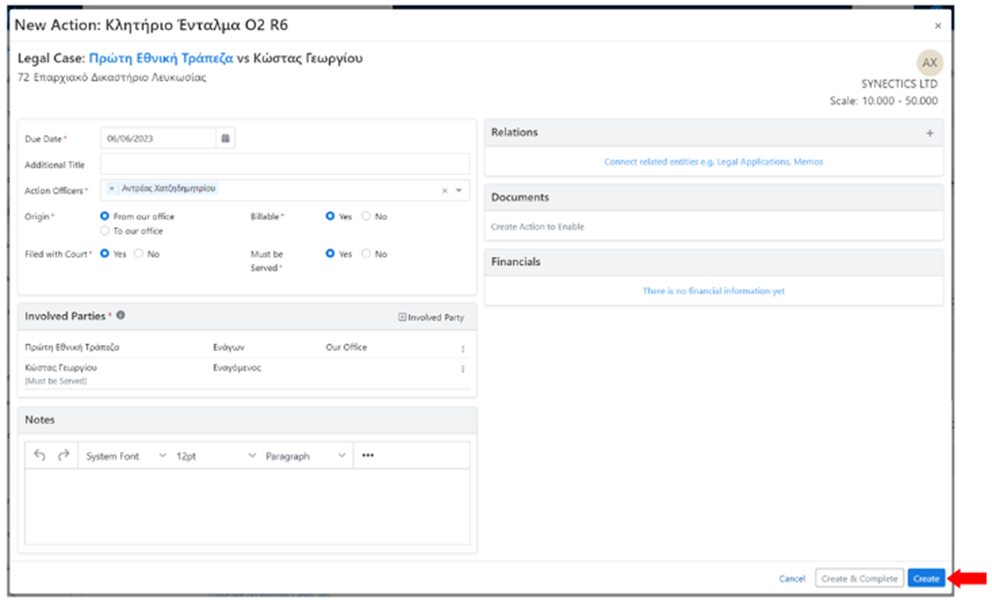
Create the Filing Action for the Originating Document
Click on the + Action button, find, and select the correct Action Type.
Complete the fields in the New Action window:
Due Date: The deadline for the filing of the Originating Document (this is also the date shown in Dashboard, Upcoming Actions widget).
Additional Title: Anything we want to append on the Action Title
Action Officers: The lawyers that will be responsible for the filing of the Originating Document.
Origin: Select “From our Office” when the action needs to be done by our Firm (outgoing) and “To our Office” for the incoming actions.
Billable: Select Yes for billable actions.
Filed with Court: Select Yes when the document attached to the action must be filed with Court.
Must be Served: Select Yes when the document attached to the action must be served to the involved Other Parties.
Click on the Create button.
Create the Document (or upload it if it already exists).
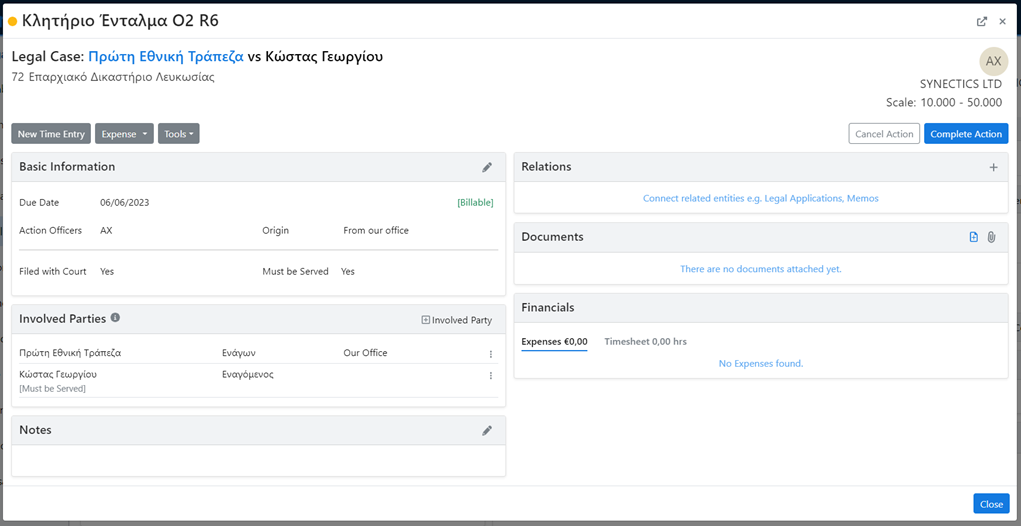
Complete the Filing Date, the Court Number and register the Out-of-Pocket Expenses
When the document is filed with court:
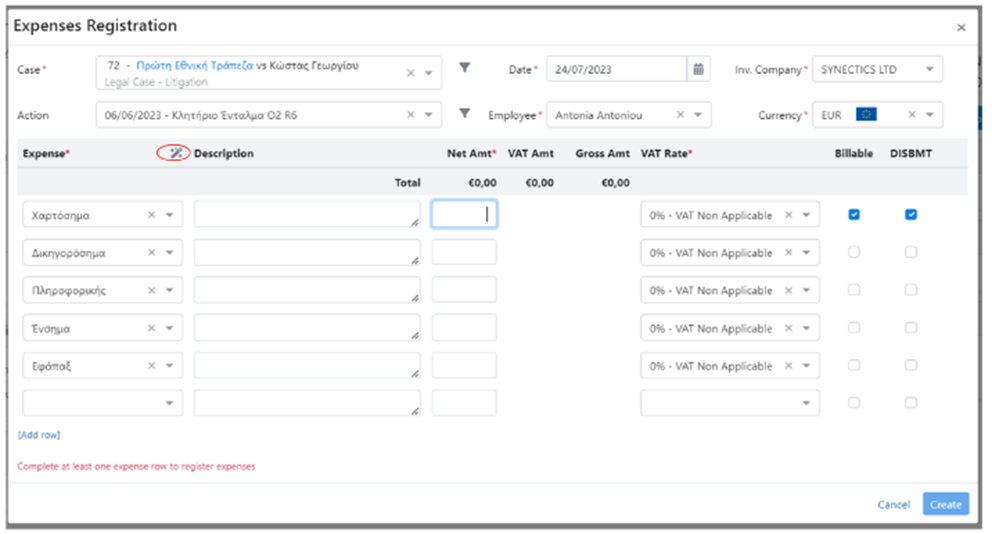
Register the out-of-pocket expenses using the Expense Set button if needed.
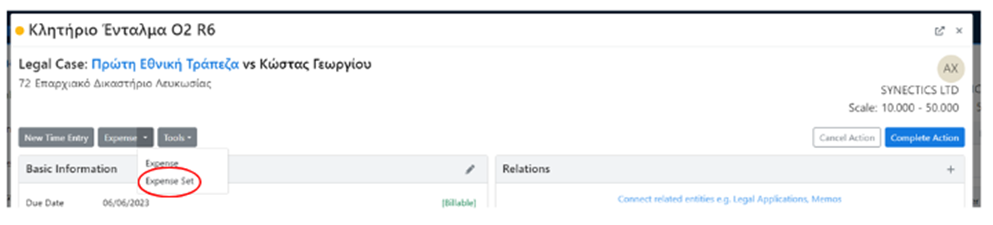
Click the wizard icon to automatically complete some common Expense rows, which you will need to add only their amounts.
Register the time entries using the New Time Entry button if needed.
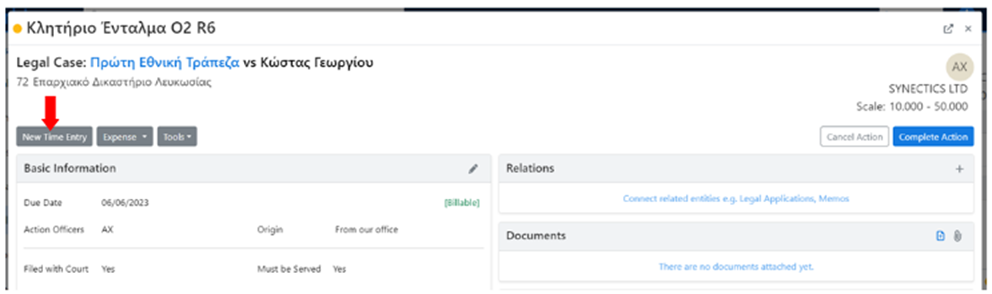
Click the Complete Action button.
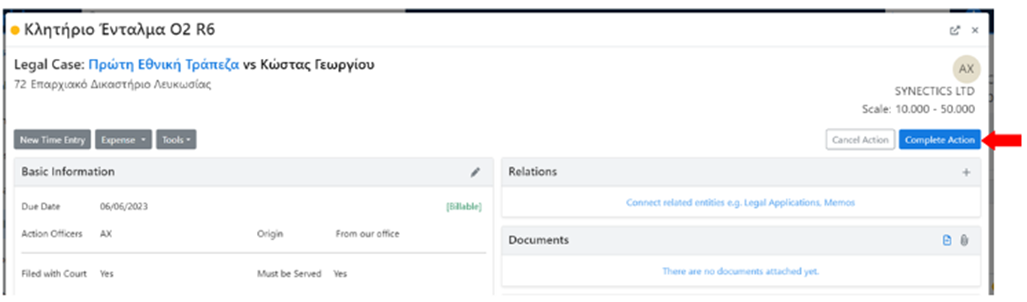
Complete the fields in the Complete Action window.

Create the next action(s) as needed.
Locate your Case
Press on the + Action button, listed in Arbizon’s main Action Bar
Locate the Action Type you prefer and Click on it.
Tip: You can enter keywords in the search bar that appears once the + Action is clicked, to easily locate the action type you are looking for.