
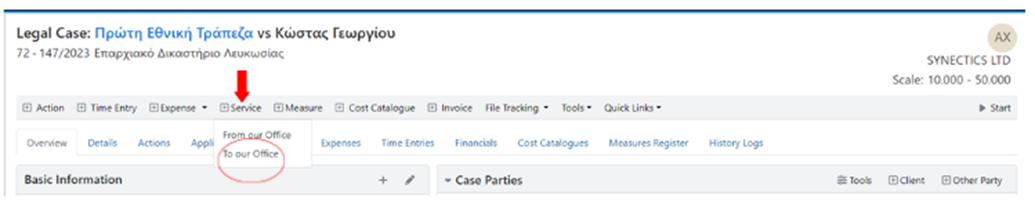
Open the window for creating a new Service
-
View the Legal Case.
-
Click on the + Service button and then From our Office button.
Complete the Documents that will be Served
-
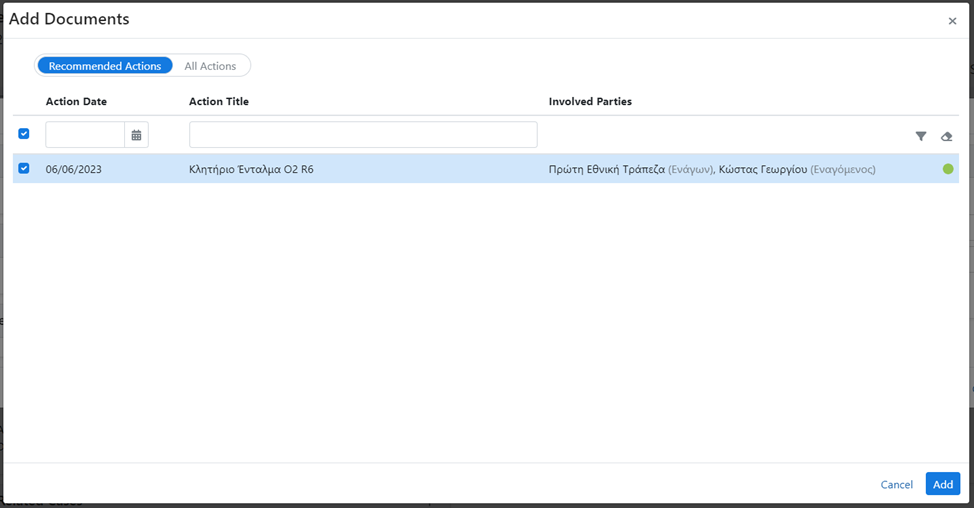
Click on the + Document button and select the Actions with the documents that need to be served.

-
If the required actions are not listed under the Recommended Actions then select All Actions.
-
Select the required actions and click Add.
Complete the Recipients & Recipient Addresses related to the new Service
-
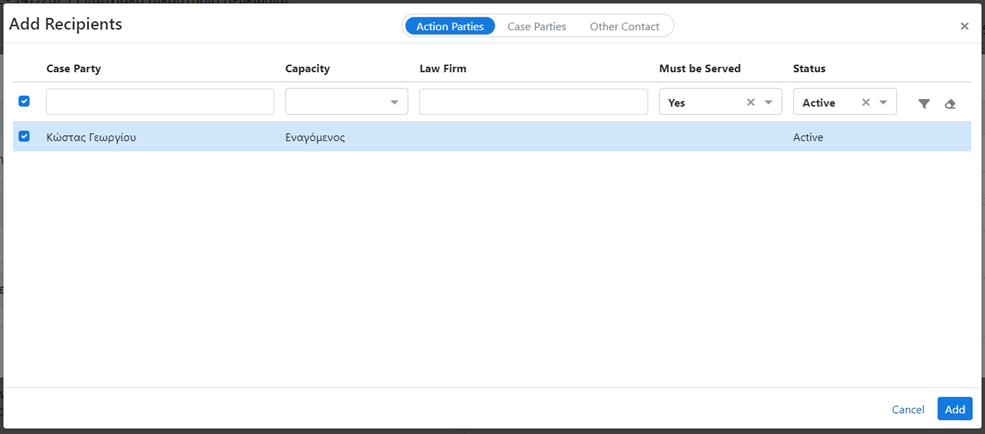
Click on the + Recipient button, select the recipients and click Add.

-
Add the Recipient Address either by selecting it from those registered in the system (+ Add from Recipients) or by adding it manually (+ Add New).

Complete the Service Details
-
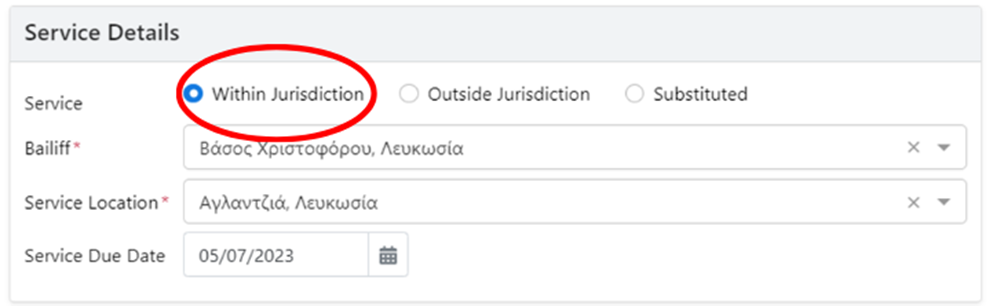
If the Service is Within Jurisdiction, complete the fields:
-
Service: Within Jurisdiction
-
Bailiff: Select the bailiff name.
-
Service Location: Select the service location.
-
Service Due Date: The service due date
-
-
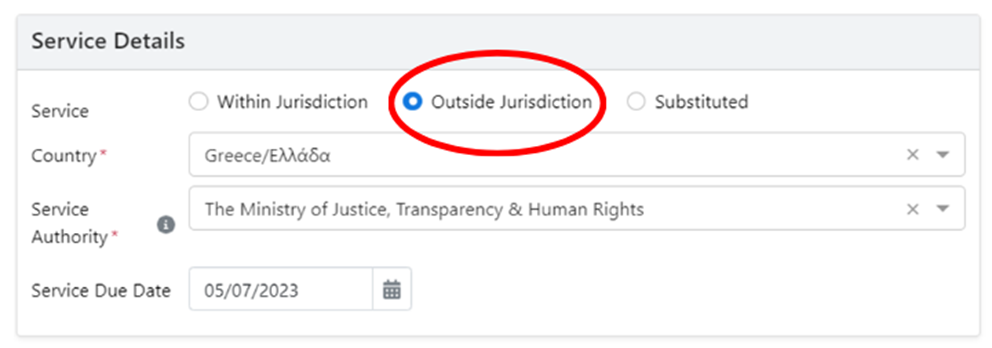
If the Service is Outside Jurisdiction, complete the fields:
-
Service: Outside Jurisdiction
-
Country: the country where the document will be served.
-
Service Authority: the country authority that will handle the service of the document.
Note: Service Authority field will be visible only when choosing to serve a document to countries with known authorities. -
Service Due Date: the deadline for the completion of the service.
-
-
If the Service is Substituted, complete the fields:
-
Service: Substituted
-
Service Method: the substituted service method you will use, e.g., Viber.
-
Bailiff: the person to whom the service of the document will be assigned.
-
Service Location: the area in which the bailiff will go to serve the document to the recipient(s).
-
Service Due Date: the deadline for the completion of the service.
-
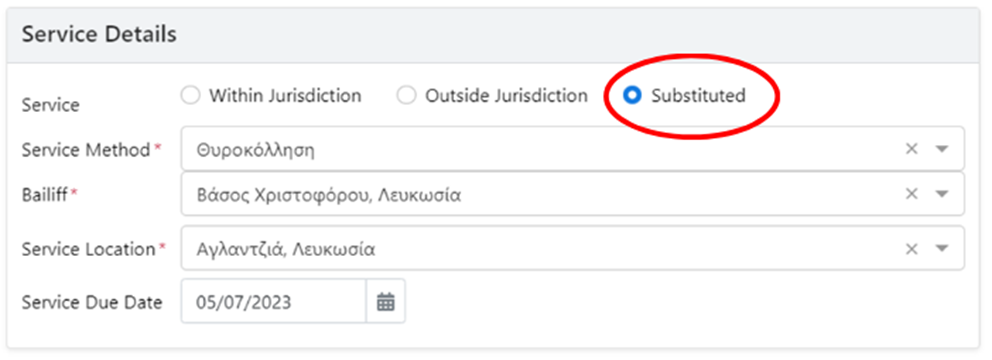
Note: Bailiff and Service Location fields will be visible only when choosing a substituted service method which requires to be assigned to a bailiff.
Related Articles
How to Define which Documents Need to be Served to a Contact